Adding Documents
Adding new documents is performed in the Documents section. To add a new document:
- Click "Documents->Create" in the main menu
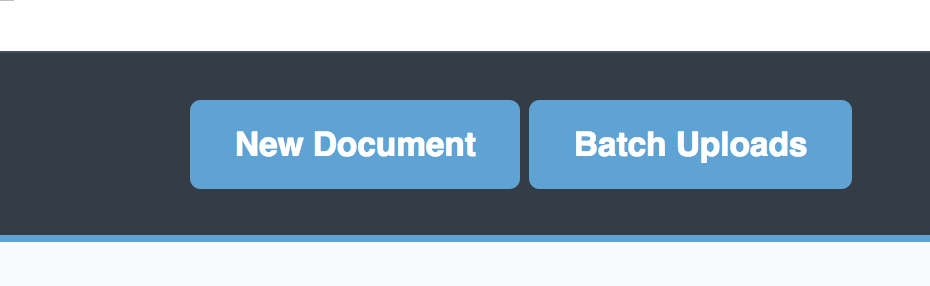
- Or if you are on the Documents List you can click "New Document" in the upper right
- You will then be presented with a form in which you can begin entering the details about the new document. The first section you will see is titled "File" and is where you will physically attach your file(s) to the document record.
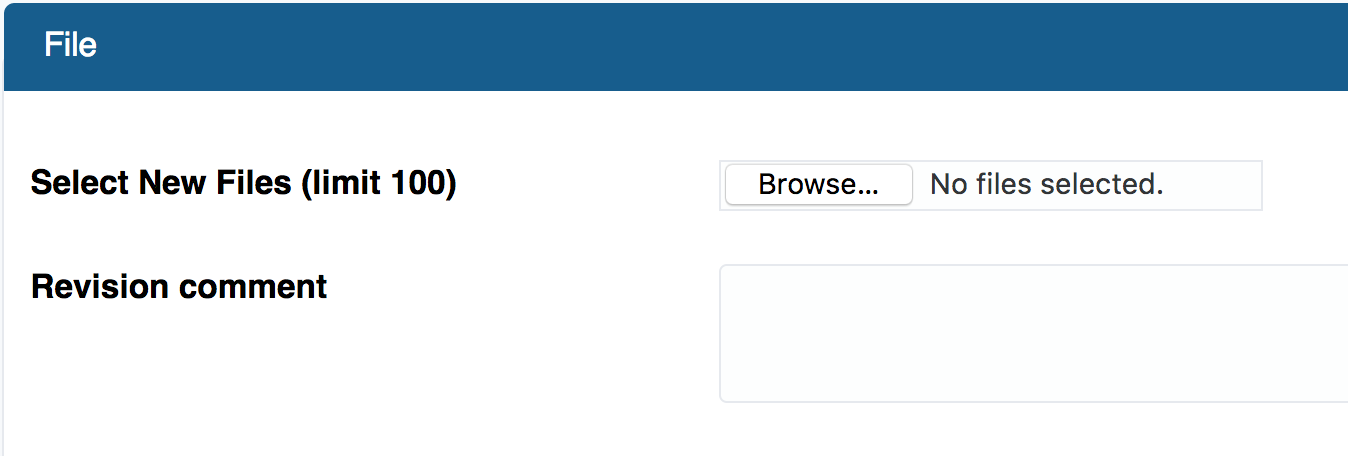
- You may either click on or drag/drop onto the "Browse" button. Clicking will bring up a document chooser while dragging a file onto the button will place the file into the form.
- You can select or drag/drop multiple files at once (100 max). When you save the form each of the files you attach will create its own document record and each will receive the same meta-data that you enter on this form. Use this if you have many files that have similar meta-data such as description, user permissions, group permissions, folder, etc..
- Once you have selected your files to attach to the document you will want to complete the rest of the form. Lets talk about each of the available fields:
"Details" Section
- Comment: This is the place you may enter any text that will be helpful to other users as they search for documents.
- Description: Another free-form fields which you may add a general description of the document and will be searchable.
- Assigned User: This should be set to the user you would like to receive notifications and receive administrative rights to this document by default. Also known as "owner".
"Tags" Section
The Tags input can be used to quickly add or choose keywords to the document that can be used by users when searching. To use this field you begin typing the tag or keyword and if it already exists you may click to choose it. If the tag does not exist you will complete the text entry and hit the "TAB" key to set the tag and you may then begin typing another tag or you can proceed with the rest of the form.
"Metadata" Section
If your company has created any custom metadata fields they will show up here.
"Workflows" Section
If your company has created any approval workflows they will show up here. You may either click, control-click, or shift-click to select the workflows that this document will be assigned to.
"Folder" Section
Choose the folder you would like the document(s) assigned to. The company default folder will be pre-selected but you may choose another from the list. Each document may only be assigned to a single folder. This folder is used in the Dashboard "Document Tree" as well as the "Filter" section of the document list.
"User Access Control" and "Group Access Control" Sections
If you need to set specific user or group access permissions for the document(s) you will do so here. Simply select a user/group and select the permission level. To add additional permissions entries click the "New User Permission" or "New Group Permission" link to add a new row in which you can configure additional access. By default the user who is uploading the document will be pre-set with Admin permissions.
When everything is filled out the way you need it you would then click "Create Document" to save your settings and create the document record(s).
Note: When uploading multiple files at once it could take a few minutes depending on your Internet upload speed.
Updating Documents
When it comes time to update an existing document you will follow a pattern of check-out and check-in.
Check-Out
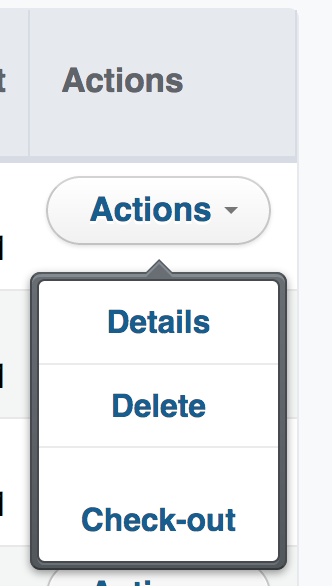
The first thing you do when you want to edit an existing document is to click on the Check-Out button or link for the specific document you are wanting to edit. There are a number of places where you may see a Check-Out button. An example of the Check-Out link on the Documents page under the Actions menu:
When you perform a check-out the system will "lock" the document from further editing and immediately place you into edit mode for that particular document. You may then proceed to update meta-data or upload a new file revision. When you are done with your current edit you will click the Update Document button.
Note: changes to meta-data will be seen immediately upon saving the changes; new file versions however will only be available once the document is checked-in.
Note: When a document is checked-out the Check-Out links will be replaced with an Edit link.
The document remains checked-out until you are ready to submit your changes by performing a Check-In.
Check-In
Check-In is the action you perform when you are done editing. When you check-in a document you are telling the system to unlock the document so that others may check-out the document and make their own changes. If your company uses Workflows then the check-in process triggers the start of the Workflow process. If you company does not use Workflows the updated document will be immediately available to permitted users.
Downloading and Viewing Documents
If you are simply interested in downloading or viewing a document there are a number of links that will allow you to do just that. You may see the icons: ![]() or links throughout the application. When you click on the Download link it will send the document to your computer. Clicking on the View link will open up the document in an in-browser document viewer window.
or links throughout the application. When you click on the Download link it will send the document to your computer. Clicking on the View link will open up the document in an in-browser document viewer window.
The document viewer has a few features that can be used such as search, annotation, redaction, e-sign, etc.. Some of these actions will require you to save the document to your computer once you have made the necessary changes. You can then upload that saved document as a new file revision for an existing document or create a new document from it.
Note: If a user has View permissions on a document they will only be able to view the document and will not see the download, print, or other buttons in the document viewer window. A user with Download permissions can see all of the actions available in the document viewer window including download, print, annotate, etc..
Viewing Actions
The following actions are available in the document viewer depending on the users' permission level:
- View - view the document
- Search - search through the contents of the document
- Redact - redact or hide certain parts of the document
- E-Sign - add an electronic signature to the document
- Download (downward arrow) - download the document as it exists in the preview
- Print (printer icon) - print the document as it exists in the preview

Deleting and Restoring Documents
Users with admin permissions on a document will have the option of deleting the document. When a document is deleted it is placed into a soft-delete state. In a soft-delete state no non-admin users will have access to the document nor see it in the documents list. If a document should be permanently deleted the document admin can choose to Perma-Delete the document which permanently removes the document from the system.
In the even that a document was soft-deleted and it is determined that it should be placed back into service the document admin can Restore the document which will place it back into circulation.
Importing Documents
Multi-Upload:
You would use the multi-upload import when you have a number of similar documents (100 max) that need to be imported. This is best used when your documents will all have the same meta-data such as folder, user/group permissions, tags, workflows, etc..
Video: Multi-Upload walk-through
To perform a multi-upload follow these steps:
- Click on the Documents menu
- Click New Document
- Click on the Browse button and shift-click/ctrl-click files in the selection window or drag/drop files onto the button
- Fill out the rest of the form and click Create Document
| <<< Previous (Loggin In) | Next (Finding Documents)>>> |
0 Comments